This is an AI translated post.
Using the Channel Section Option in Slack, a Collaboration Tool
- Writing language: Korean
- •
-
Base country: All countries
- •
- Information Technology
0000-00-00 00:00:00
Select Language
Summarized by durumis AI
- We learned how to organize channels into sections in Slack.
- While sections can be used to effectively manage many channels, they are only available in the paid version, and new members need individual settings.
- This article details how to use sections, including organizing channel names, creating sections, moving channels, and other considerations.

Using section options in Slack channels for organization
This guide will walk you through how to utilize section options in Slack channels. Think of it as a feature that allows you to group and organize numerous channels.
Pros and Cons
Pros1 : It can be used as a powerful tool for organizing a large number of channels.
Pros2 : Even with the same channel list, each individual can set different sections.
Cons1 : Newly invited members will not have any sections set up, so they need to be configured individually.
Cons2 : Only available in paid versions.
Basic information before using sections : From the perspective of newly invited members, if the channel names are not organized, it can look messy and confusing.
Therefore, channel name organization should be prioritized.
※ Link to the article on channel name organization Reference Link

Conditions of use
Paid Version (Pro) Available from and above
All Members and Guests using Multi-Channelare also available
How to create a section
1. Hover over the [Channel] name.
- It doesn't necessarily have to be a [Channel], it can also be created in the [Favorites] or [Connections] section.
- For sections you created yourself, you can't create new ones, you can only modify existing sections.
2. Then click the [3-dot button] that appears.
3. Click the [Create Section] button.

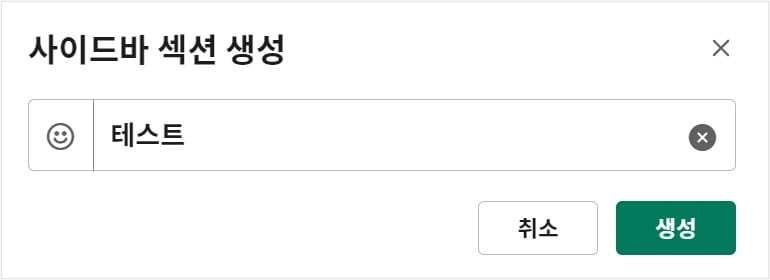
4. ①"Choose a helpful name" will appear. In this area, define an appropriate section name.
- You can also set an ②icon at the same time.
- You can use existing icons or register new ones.

5. After typing the section name, click [Create].
6. Once created, only the section is created, not the channel.
- You can drag and drop the channels to be included in the section.
- You can only move one at a time. If you want to move multiple channels at once, please refer to [Edit All Sections] below.
How to edit all sections
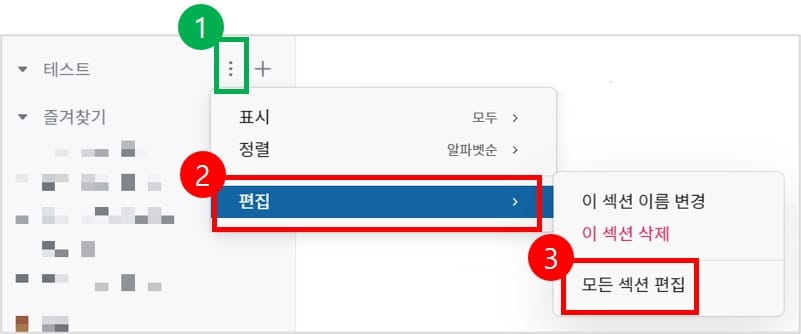
- Hover over the created section.
- Click the [3-dot] button to find and click [Edit] → [Edit All Sections].
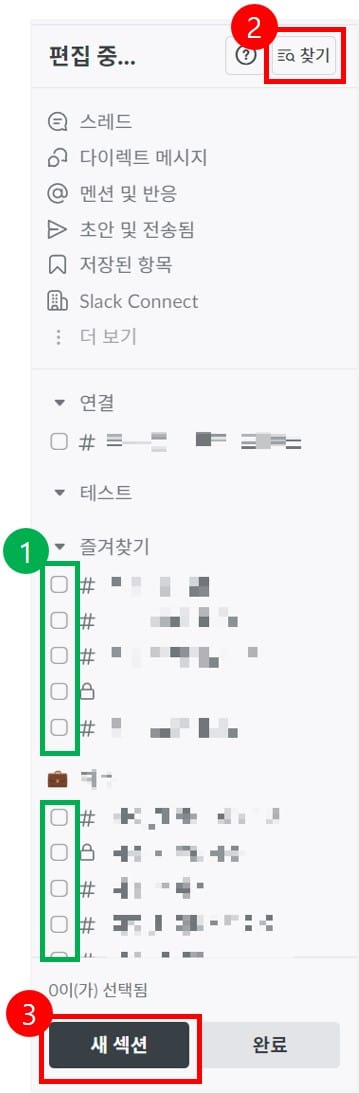
- An edit window will pop up.
- ① You can select multiple channels and drag and drop to adjust their positions within the section.
- You can adjust the position of the section, but you cannot change the order of the channels.
- ② You can search for a specific channel among many channels.
- ③ You can click the [New Section] button to create a new section.
- The rules for creation are the same as explained above.
- ① You can select multiple channels and drag and drop to adjust their positions within the section.
Other Notes
- You can move channels between created sections. You can drag and drop the channel to move it.
- Even though it's divided into sections, you can't change the order of the channels within one section. This is because they are in alphabetical order.
- If you don't like the alphabetical order, you can use [Sort] to select one of the three options: "Recent Activity / Alphabetical Order / Priority".